Configure Page List

Friday, February 11, 2011

Happy Valentine's Day...

 
How cute is this little hedgehog....you guessed it, another Penny Black stamp this time destined for DH on Monday14th Feb, along with a couple of 'win for life' scratches....oh how magic that would be....and of course a red chocolate heart, plus one for me!

You wouldn't believe me probably if I said this card took me a whole Saturday afternoon to create - yes that's right.  I started with a blank mind and went from there, trying this and that, choosing this stamp or that one, and finally here is the end result, which I just love.....this cuddly little morsel would make anyone feel warm and fuzzy.

The base card measures 11cm x 11cm a little larger than a mini but just as cute. The two top cutouts were zipped through the Bigshot using the 'Labels Three' spellbinder nestabilities die.  These have been raised using the foam dimensions to give a 3D effect as has the sentiment cutout too.

Materials used are:

Cardstock:  Real Red which has been embossed with the Swiss Dots EF.
Paper:  Bella Rose DSP and watercolour paper for stamped image.
Stamps:  Penny Black clear stamp - 'Wonderful' series of 10 stamps and Whimsical Words
Bigshot:  Labels Three Spellbinder Nestabilities die - two different sizes used
Punch:  Extra large curly label punch.
Ink:  VersaCraft White, Staz On Black, SU watercolouring pencils used with the aqua painter.
Accessories:  black self adhesive half pearls.
Hope you like it....Keep smiling, Ann


Millie's turned ONE!


Our gorgeous Grand-Daughter Millie has just turned ONE....oh how that brings back a flood of memories from our own children - and how quickly those years have gone by; we absolutely love being Grandparents and all that comes with it.

I had so much fun creating this card for Millie.  I wanted it to be pretty as well as a 'party' of colour.

The stamp is one by Penny Black and the range available is just gorgeous - for both little ones as well as grown ups!  I have some that will certainly have you laughing.

I tried my hand at water colouring and had a great time experimenting, sometimes holding my breath for fear of making a mess of it, but I am really happy with the end result.  The main cutout is raised with small foam dimensions to give it a slightly raised effect. You're never to young for diamonds, so to add a little pizazz I added some 'dazzling diamonds' to the edge of the cupcake icing.  Don't forget to click on the image to get a larger view and see the detail if you want.  It certainly helps when casing a card.

Unfortunately at the time of working on the card we were experiencing humid weather which played havoc with my cardstock, making it a little damp and can curl the edges. I ended up putting a book on the card to stop it from curling - that works but it also flattens everything and I'm not sure how to get around this problem.

The SU materials used in this card were:

Stamps:  For a Friend, Penny Black - Cheesecake Party No. 1665K
Cardstock:  Very Vanilla (card base), Lovely Lilac, Regal Rose, Tempting Turquoise (butterfly) and the stamped image is on watercolour paper.  The DSP is from the Lap of Luxury range.
Bigshot:  Swiss Dots embossing folder, Top Note Die and Beautiful Wings Embosslits
Ribbon:  So Saffron 5/8" wide grosgrain
Punch:  Oval scallop extra large

Have fun and keep smiling....Ann

The Robust Mouse

 
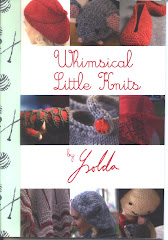
I few weeks ago I tried my hand at knitting again, as a way of increasing my skills in this area, and this was the end result.  Mousie is his name and he looks like he could tackle any challenge - because he's knitted in 12 ply instead of the quaint 4ply the pattern recommends; but for me, it was more about completing the project and learning from it than worrying about the yarn ply.

This was a great little project and one that taught me quite a few new stitches with Google as a backup.  The pattern is from the book 'Whimsical Little Knits' by Ysolda which is available at Jellywares on Marshall.  I hope Mousie brought a smile to your face.....Regards, Ann.

Tuesday, January 18, 2011

Happy 21st Birthday to you....

A card destined for my niece who is turning 21 today.  I cased this card from one of my favourite stampers Chat Wszelaki; details are below if you want to case.  This card design is very universal and could be used for many other occasions.  We have had quite a bit of humid weather lately with the storms that have been around and it's made my cardstock go limp. I'm thinking of using a heavier cardstock for my base to give it more strength; I'm finding the SU whisper white seems a little weightless and struggles to handle a lot of layering, especially when the weather is humid.  I've had a heavy book on this card to stop the card from bulging.  Sometimes I print my inside message on a coloured sheet and adhere this to the inside of the card.  I've found not all cardstock absorbs ink the same and there are differences in the quality of image so it's a matter of doing a test job if you want to see how well the heavier cardstocks ink up.

You may or may not of noticed that I've also changed my blog background.  It was time for a face lift big time......I got this one from HOT bliggity Blogs and I found these instructions super easy with installing a new background on your blog

I've also been trying to improve my card photography and found this link on Splitcoasters which you may find helpful for your projects.  Just putting your card on a slight angle I think has made a big difference and allows layers to be seen as in this card photo.  I'm still working on getting the light right.  The instructions also include how to edit in Photoshop which I'm struggling a little bit with, but I'll get there.  Here are the instructions from Amy Sheffer at http://www.splitcoaststampers.com/forums/photography-f217/htdt-7-22-09-photographing-your-papercrafting-projects-t515388.html

Stamps:  Just Believe and Perfect Punches
Paper:  Whisper White, Pretty in Pink and Chocolate Chip
Ribbon:  5/8" Grosgrain ribbon in Pretty in Pink
Ink:  Chocolate Chip and Pretty in Pink
Bigshot:  Square Lattice EF and  BeautifulWings Embosslits
Punches:  SU 2 x 1-3/8" oval punch
Accessories:  adhesive pearls, adhesive 'at home stash' numbers/alpha sheet and dimensions for the birthday sentiment.  The birthday image was trimmed around the oval border and then glued to the chocolate chip cardstock and punched out using the oval punch.  Hope you like it....I loved making it.  Thanks for dropping by.....keep smiling....Ann