Configure Page List

Friday, February 11, 2011

Millie's turned ONE!


Our gorgeous Grand-Daughter Millie has just turned ONE....oh how that brings back a flood of memories from our own children - and how quickly those years have gone by; we absolutely love being Grandparents and all that comes with it.

I had so much fun creating this card for Millie.  I wanted it to be pretty as well as a 'party' of colour.

The stamp is one by Penny Black and the range available is just gorgeous - for both little ones as well as grown ups!  I have some that will certainly have you laughing.

I tried my hand at water colouring and had a great time experimenting, sometimes holding my breath for fear of making a mess of it, but I am really happy with the end result.  The main cutout is raised with small foam dimensions to give it a slightly raised effect. You're never to young for diamonds, so to add a little pizazz I added some 'dazzling diamonds' to the edge of the cupcake icing.  Don't forget to click on the image to get a larger view and see the detail if you want.  It certainly helps when casing a card.

Unfortunately at the time of working on the card we were experiencing humid weather which played havoc with my cardstock, making it a little damp and can curl the edges. I ended up putting a book on the card to stop it from curling - that works but it also flattens everything and I'm not sure how to get around this problem.

The SU materials used in this card were:

Stamps:  For a Friend, Penny Black - Cheesecake Party No. 1665K
Cardstock:  Very Vanilla (card base), Lovely Lilac, Regal Rose, Tempting Turquoise (butterfly) and the stamped image is on watercolour paper.  The DSP is from the Lap of Luxury range.
Bigshot:  Swiss Dots embossing folder, Top Note Die and Beautiful Wings Embosslits
Ribbon:  So Saffron 5/8" wide grosgrain
Punch:  Oval scallop extra large

Have fun and keep smiling....Ann

The Robust Mouse

 
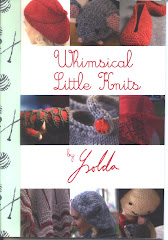
I few weeks ago I tried my hand at knitting again, as a way of increasing my skills in this area, and this was the end result.  Mousie is his name and he looks like he could tackle any challenge - because he's knitted in 12 ply instead of the quaint 4ply the pattern recommends; but for me, it was more about completing the project and learning from it than worrying about the yarn ply.

This was a great little project and one that taught me quite a few new stitches with Google as a backup.  The pattern is from the book 'Whimsical Little Knits' by Ysolda which is available at Jellywares on Marshall.  I hope Mousie brought a smile to your face.....Regards, Ann.

Tuesday, January 18, 2011

Happy 21st Birthday to you....

A card destined for my niece who is turning 21 today.  I cased this card from one of my favourite stampers Chat Wszelaki; details are below if you want to case.  This card design is very universal and could be used for many other occasions.  We have had quite a bit of humid weather lately with the storms that have been around and it's made my cardstock go limp. I'm thinking of using a heavier cardstock for my base to give it more strength; I'm finding the SU whisper white seems a little weightless and struggles to handle a lot of layering, especially when the weather is humid.  I've had a heavy book on this card to stop the card from bulging.  Sometimes I print my inside message on a coloured sheet and adhere this to the inside of the card.  I've found not all cardstock absorbs ink the same and there are differences in the quality of image so it's a matter of doing a test job if you want to see how well the heavier cardstocks ink up.

You may or may not of noticed that I've also changed my blog background.  It was time for a face lift big time......I got this one from HOT bliggity Blogs and I found these instructions super easy with installing a new background on your blog

I've also been trying to improve my card photography and found this link on Splitcoasters which you may find helpful for your projects.  Just putting your card on a slight angle I think has made a big difference and allows layers to be seen as in this card photo.  I'm still working on getting the light right.  The instructions also include how to edit in Photoshop which I'm struggling a little bit with, but I'll get there.  Here are the instructions from Amy Sheffer at http://www.splitcoaststampers.com/forums/photography-f217/htdt-7-22-09-photographing-your-papercrafting-projects-t515388.html

Stamps:  Just Believe and Perfect Punches
Paper:  Whisper White, Pretty in Pink and Chocolate Chip
Ribbon:  5/8" Grosgrain ribbon in Pretty in Pink
Ink:  Chocolate Chip and Pretty in Pink
Bigshot:  Square Lattice EF and  BeautifulWings Embosslits
Punches:  SU 2 x 1-3/8" oval punch
Accessories:  adhesive pearls, adhesive 'at home stash' numbers/alpha sheet and dimensions for the birthday sentiment.  The birthday image was trimmed around the oval border and then glued to the chocolate chip cardstock and punched out using the oval punch.  Hope you like it....I loved making it.  Thanks for dropping by.....keep smiling....Ann
Tuesday, December 21, 2010

Thinking of you....


I truly love everything about this card.  It is on its way to my cousin who lives in the UK.  I received her Christmas card the other day, which I always look forward to, as the English cards are so lovely with the winter scenes.  Unfortunately she has been diagnosed with bowel cancer.  I couldn't believe what I was reading when she told us, but I knew I had to make a very special card to send to her, to bring us closer together than the thousands of miles that separate us, and to give her a few minutes reprieve from the worry she must be having when she receives this, along with a special little gift. 

Another cased card from Chat at Me, My stamps and I, and it was exactly what I was looking for.  I replaced the covered button with a brad from the SU antique brads selection.   The DSP across the bottom was from a little pad I have called Queen Bee.  It is 6" x 6" and has a selection of 30 sheets, one of each design.

Thanks for dropping by.  Have a wonderful Christmas, with much laughter and happiness and best wishes for a safe, very healthy and prosperous 2011!

Kind regards, Ann

A gift from me to you....

This is the first card in a bundle of 12, I have made as a Christmas present for my son's partner Amy. Amy commented to me once that she loved the way I made the handmade cards....and I've always thought I would do her a mixed bundle of cards as part of her gift this year. I purchased a little box with a Christmas tree on the front to place them in. As the box was narrower than the standard envelopes I usually use, I had to make the cards slightly smaller to fit inside the box with a smaller standard envelope to go with them.

The first three cards use the SU set called 'Just Believe'. It is a gorgeous set, which has become one of my favourites, and has so many possibilities for its use.  I got the ideas for these cards by purchasing a kit from one of my favourite stampers, namely Chat Wszelaki.  It was the October 2010 Kit Tutorial available on her website.


This one was created quickly with the Elegant Lines embossing folder and the Beautiful Wings embosslits Dies, I just love these and the SU ones gives such a deep and crisp image.  The die comes with 5 differently sized butterflies, 4 embossed and one left plain.  The blue mounting piece behind the 'happy birthday' image is a sizzlit from the 'lots of tags' pack.

These little 3" x 3" cards are from another favourite card maker Stampin-Style with Mike. Here you will find all the info to case them if you wish. I just love mini cards and feel they can give just as much pleasure as a larger card. These mini's also use another little addition to my card resources, namely the 'movers and shapers die cutting system'. I haven't played with it much, except to make these cards, but can see again a lot of possibilities.


And finally, a little hedgehog from the SU 'Fun and Fast Notes' set.  The 3" x 3" cards are unable to be posted through Australia Post obviously because of their size.  Sometimes I don't put them in an envelope, but just adhere them to the top of the present for added pleasure. 

Thanks for looking.  Keep smiling, Ann

Monday, November 22, 2010

Birthday Blessings

Two postings in the one day, this will be a first...this card is for my mother-in-law for her 80th birthday.  It's another cased card by another favourite blogger No Time To Stamp; thanks Sharon.  She does some amazing cards and and has some great stuff to add to your wish list.  But I think her biggest favourite is her love of beautiful ribbons which are a delight to work with.  The one opposite is 1.25" Ivory pure silk and I used the large bow easy to make it.  If you zoom in you can see it is a double bow.

This was a large card (base 14 x 21 cm) due to the 'birthday blessings' sentiment (9 x8.5 cm) which was stamped in Night of Navy on Very Vanilla c/s.  The DSP is called Blue Awning and Sharon has the matching adhesive flowers which really do the card justice.  The little cut out in the top LH corner was a spellbinders die called Vintage Dies, there are 4 in the set and each are 2" x 2". I have been wanting to have a go at these for a while; they are excellent and to make it even better I purchased some time ago a little machine called a Xyron that turns them into stickers.  It takes cut outs up to 1.5" wide and you simply drop your cut out, right side up, down a little slot, pull on the tape at the other end and it draws your cut out through and places adhesive on the back of it....absolutely brillant for these fiddly little morsels.  I also had a go at using my new scallop trim punch too....just on the corners.  On the inside of the card I placed a strip of the blue poka dot DSP across the bottom, about 3cm in width, and placed in the centre of this a repeat of the spellbinder cut outs.  So yes as you can see I've had a great time in my little space of the house.

Thanks for dropping by, take care and keep smiling.....Ann